How to Turn a Photo to Blueprint Art With AI (Prompt Included)
Turn any photo to blueprint art with AI: the exact prompt we use, two before-and-after examples, which photos work best and why the measurements are made up.
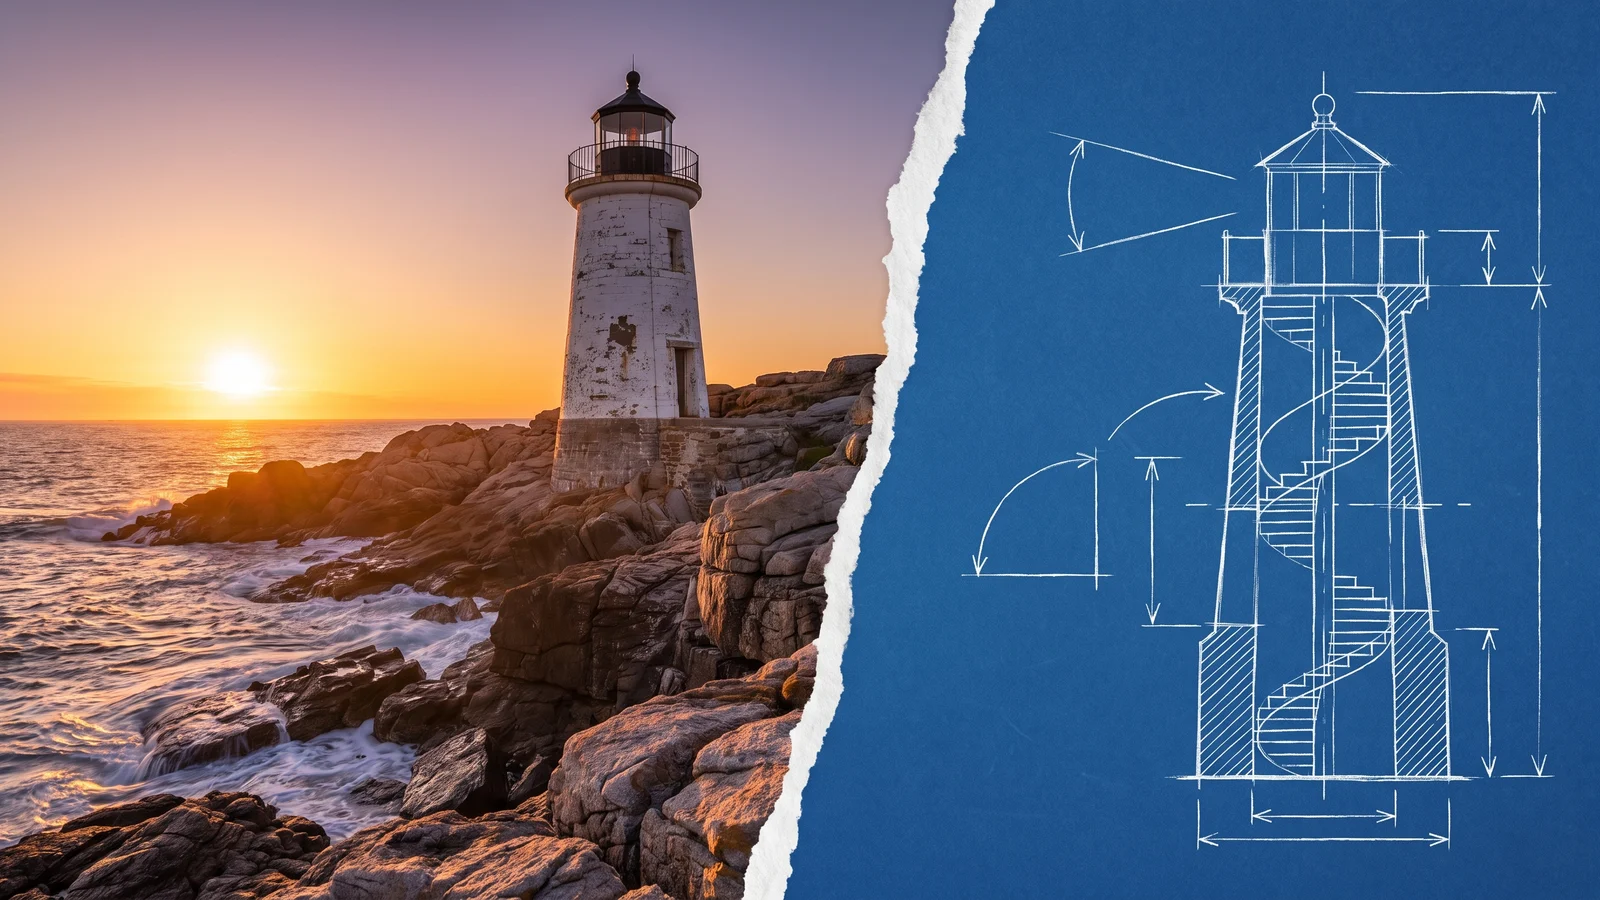
Turning a photo to blueprint art used to mean tracing it by hand in a design app. Now an image model can do it in one pass: it keeps your photo, then draws white blueprint lines, dimension arrows, cross-sections and labels right on top of it, like an engineer's notes on a print. This guide shows the exact prompt, two before-and-after examples, how to get clean results — and the one thing you must know before using the output anywhere serious.
The fastest way to try it is the AI blueprint sketch generator, which runs this prompt for you. If you prefer to work in your own image model, the full prompt is below.
What "photo to blueprint" actually produces#
There are two different looks people mean by "blueprint":
- Annotated photo — the original photo stays visible, with hand-drawn white technical lines, callouts and a title banner layered over it. This is the style below, and the one that performs best on social media because the subject is still recognizable.
- Pure blueprint drawing — white lines on solid blue paper, no photo at all. It looks more like a real technical drawing but loses the "wow, that's my house" effect.
Both are illustrations. Neither is a measured plan — more on that in a moment.
Before and after: two examples#
We generated two source photos with AI (fictional buildings and objects, so no real property or brand is shown), then ran each one through the same prompt on Nano Banana 2.1 — the model the Viberot effect uses — once each, without picking the best of several tries.
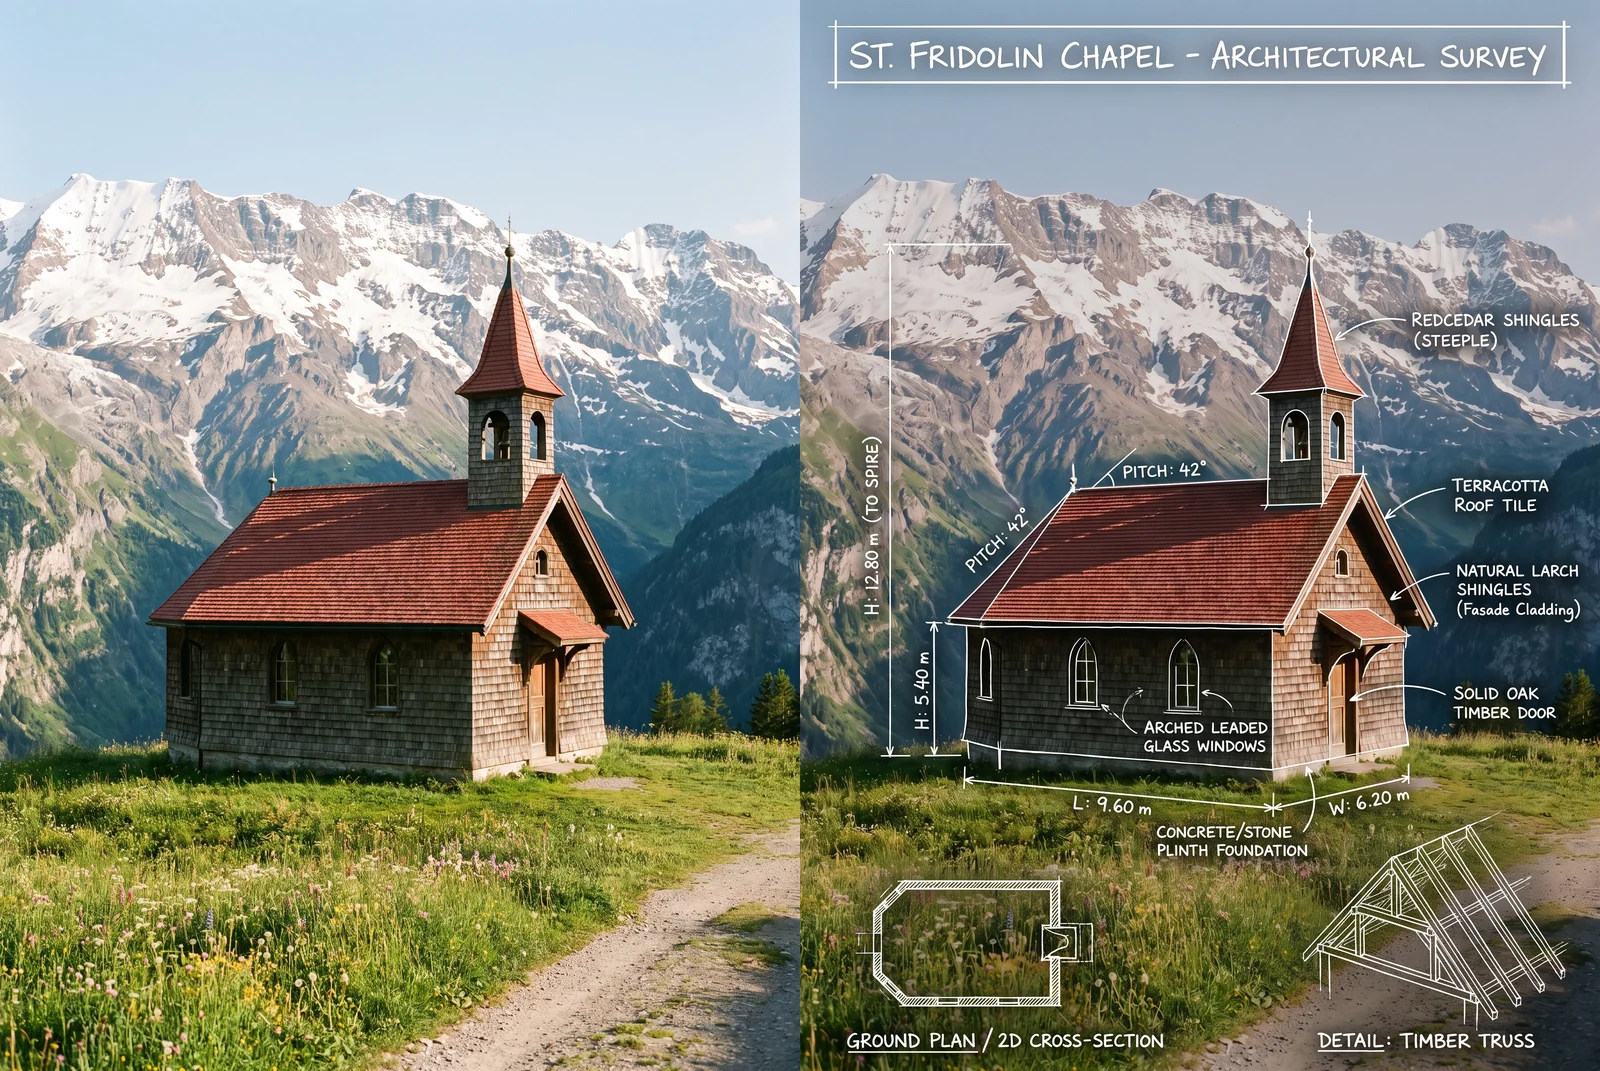
The chapel came out the way you'd hope: a title banner, overall height to the spire, wall height, length and width along the base, the roof pitch, material callouts for the shingles and the door, plus a small ground plan and a roof-truss detail in the corners.
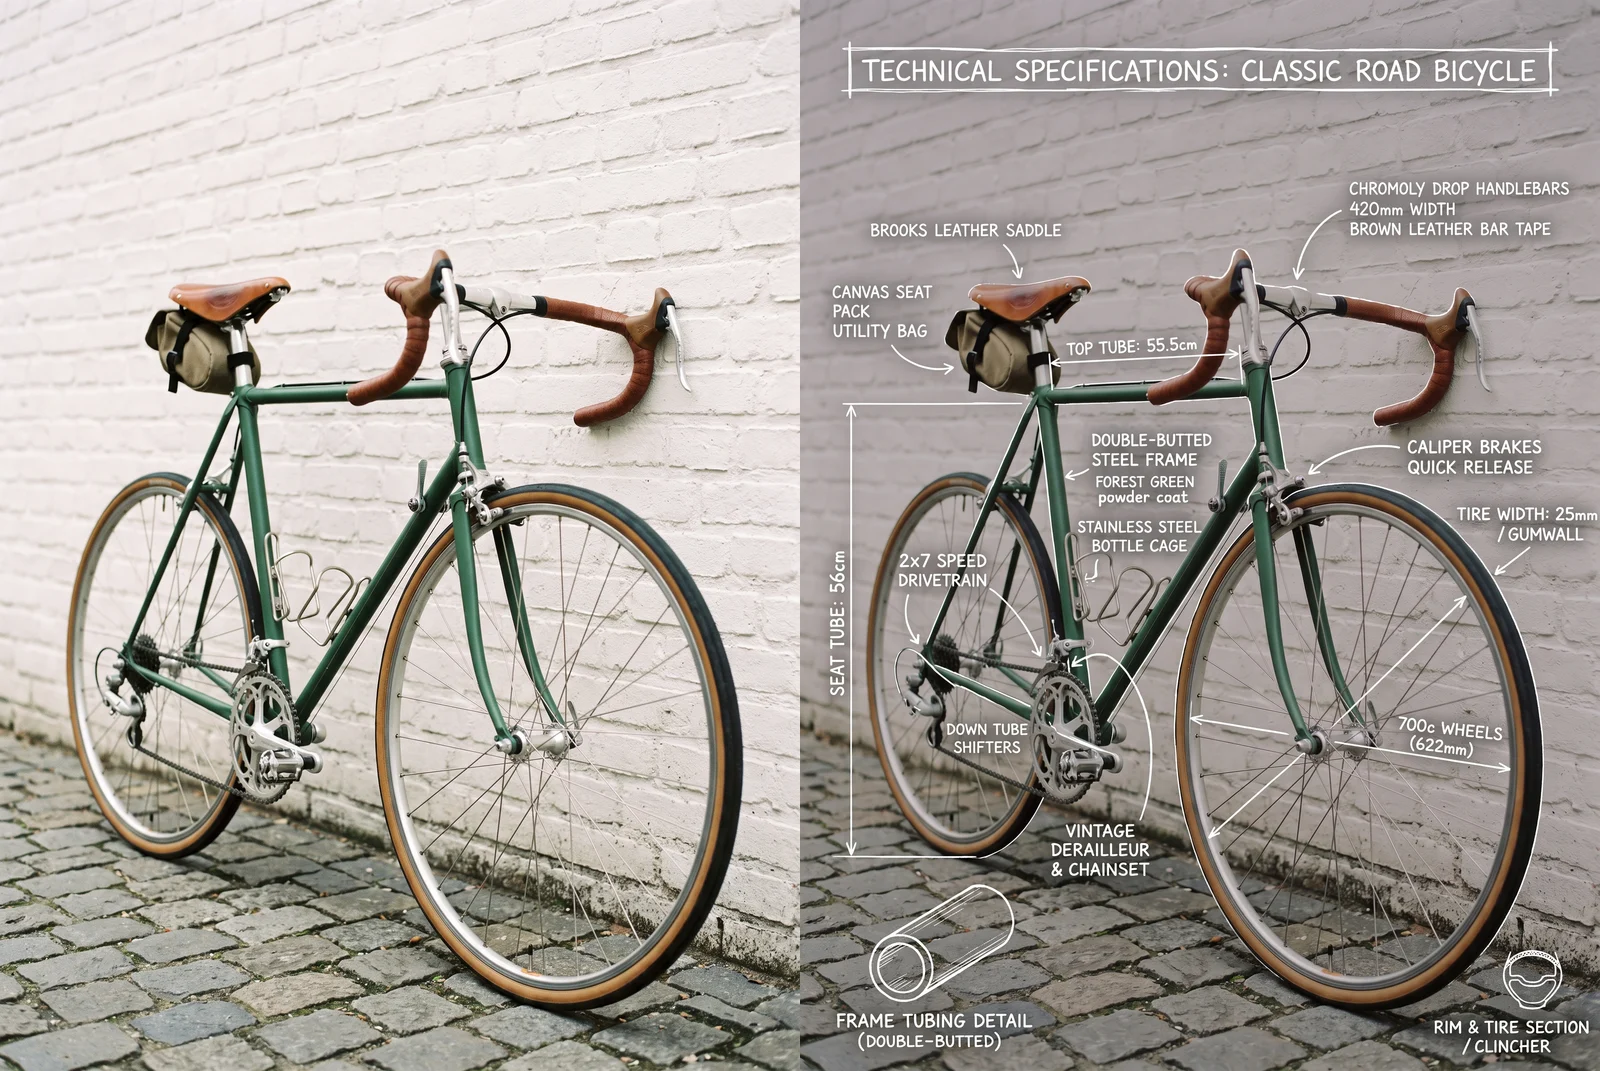
Objects work too. On the bicycle the model labeled the frame, the drivetrain, the brakes and the wheel size, drew dimension lines along the seat tube and top tube, and added two small cross-section details at the bottom.
The prompt#
This is the exact prompt behind the AI Blueprint Sketch effect. Use it with an image model that accepts a reference photo, and attach your photo as the reference:
A technical infographic overlay on a realistic photograph. The image should feature hand-drawn white blueprint-style lines, arrows, and text annotations detailing key architectural and engineering specifications. Include a title banner at the top, callouts for major dimensions (like height, width, span), diagrams of specific construction elements (e.g., cross-sections, material details), and labels for important features or systems. The overall look should be a blend of a detailed blueprint sketch and a high-quality photoWhy it works:
- "Overlay on a realistic photograph" tells the model to keep your photo rather than redraw it.
- Naming the parts — title banner, dimension callouts, cross-sections, labels — gives the model a checklist, so the result looks like a complete drawing instead of a few random lines.
- "A blend of a detailed blueprint sketch and a high-quality photo" sets the balance. Drop it and some models cover the whole photo in lines.
Variations to try#
These are starting points we haven't tested at scale — run one image first and adjust:
Convert this photo into a full technical blueprint: white line drawing on deep blue blueprint paper, front elevation with dimension lines, a small floor plan in the corner and a title block, no photographic detail leftA technical infographic overlay on this product photo: thin white engineering lines, exploded-view callouts for each component, dimension arrows and a title banner at the top, clean minimalist styleWhich photos work best#
| Works well | Causes trouble |
|---|---|
| One clear subject: a building, car, bike, gadget or piece of furniture | Busy street scenes with many objects |
| The whole subject in frame, seen from the front or a three-quarter angle | Close-ups where the subject is cut off |
| Even daylight with visible edges and structure | Night shots or strong backlight |
| Some empty sky or wall around the subject | Subjects filling the frame edge to edge (no room for labels) |
Empty space matters more than you'd think: the model needs somewhere to put the title banner and callouts. A photo with a bit of sky above a building gives much cleaner results than a tight crop.
Read this before you use the numbers#
Warning
Every measurement, name and material in the result is invented. The model has no way to measure anything from a photo — it writes plausible-looking numbers.
Our two examples show this clearly. The chapel was labeled "St. Fridolin Chapel" with a height of 12.80 m — the building is fictional, so both the name and the numbers were made up. On the bicycle, the model labeled the saddle with a real brand name it guessed from the shape. That's harmless for a fun post, but a problem on a product page or an ad.
So before you share or sell anything made this way:
- Treat it as art, not documentation. Never use the dimensions for building, repairs or ordering parts.
- Check every label. Remove or regenerate if the model invented a brand, a place name or a claim you can't stand behind.
- Say what it is when it matters — "AI-generated blueprint-style illustration" in a caption avoids misleading anyone.
Ideas for using blueprint photos#
- Real-estate and rental listings: a blueprint-style hero image of the property stands out in a feed (keep the disclaimer).
- Product launches: an "engineering view" of a gadget, bike or watch for social posts.
- Travel posts: landmarks and old buildings look great with structural annotations.
- Gifts and posters: a blueprint of someone's first car or family house makes a personal print.
- Teaching: a quick visual to start a conversation about how structures are built.
How much it costs on Viberot#
The blueprint effect costs 8 credits at 1K, 13 at 2K and 20 at 4K. Every account gets 20 free credits each month — enough for two 1K blueprints — and failed generations are refunded automatically. If you like this style, browse all photo effects for more one-click transformations, from LEGO to pixel art.
Frequently asked questions#
Is an AI blueprint a real blueprint?#
No. It's an illustration in blueprint style. The lines and numbers look technical, but nothing is measured.
Can I turn a photo of my house into a blueprint?#
Yes, and houses are one of the best subjects. Use a photo that shows the whole front of the house with a bit of sky above it.
Can I get the classic blue background instead of the photo?#
Yes — use the "full technical blueprint" variation above. Expect to try it a couple of times; it changes the photo more.
Do I need design software?#
No. Upload the photo to the AI blueprint sketch generator in your browser and download the result.
One photo in. GIF out.
Every account gets free credits each month, and failed generations are refunded automatically.